

We have been down and out this past week with colds and such
(‘tis the season! No run for me this morning!), so unlike years past, we have had some extra time to be
crafty! I have seen these cute Mason jar
lanterns on a several craft blogs before, but we took a small spin on them to
get-‘em-done faster. For me, the quicker
the craft usually leads to a not-so-cute result. But for this particular craft, the jars have
no choice but to turn out adorable!
Here are the supplies you will need:

Mason Jars, any size
Tissue paper
Mod Podge
Paint Brush
Glue
Ribbon or paint for the tops (explained below) and Kid Helpers!
Step 1: Find several
old mason jars. You won’t be using these
babies again to can anything. I think
varying the sizes is fun, especially if you are making a ‘family’ of lanterns,
like we did.
Step 2: Pick out a
color of tissue paper. Lay the tissue
paper out on a hard surface. Lightly
cover ¼ of a mason jar with Mod Podge.
With ½ inch of tissue paper overlapping the top of your jar, start
rolling the jar on the paper, adding more Mod Podge as you go around. Basically, you are covering the outside of
the jar with the paper. Remember: less Mod Podge the better. A little bit goes a long way with this stuff,
especially when using thin tissue paper.
Too much and you are in for one sticky mess. Other tutorials have you cut ½ inch strips of
tissue paper and glue each individual strip to the jar. TIME CONSUMING!!!! We tried this with the first jar and gave up
quickly. Plus the kids were already
signed out, on the couch watching cartoons.
Not good!


(I must
have actually used this one Mason jar to can something. Just this one. The dishwasher did not do its job. Good thing we are covering it up!)
Step 3: Place some
Mod Podge along the inside lip of the jar and fold the extra ½ inch of tissue
paper inside the jar. Cut off enough
excess along the bottom of the jar, add some more Mod Podge and fold the excess
over again to cover any remaining areas not covered by tissue paper. Miss a spot?
Rip off some tissue paper, add some glue and cover your spot. This really is a fool-proof craft. The more mistakes, the better! In the end, the mistakes make for one creeeeppppyyyy
lantern!!!!!! Pick a variation of tissue
paper colors and complete Steps 1-3 for all of your jars. Let them dry completely overnight. It’s a good idea to put them on some type of
non-stick surface…a cookie sheet covered with tin foil worked well for us. Pulling dried Mod Podged jars off your nice
countertops in the morning might not be the best way to start off your day.
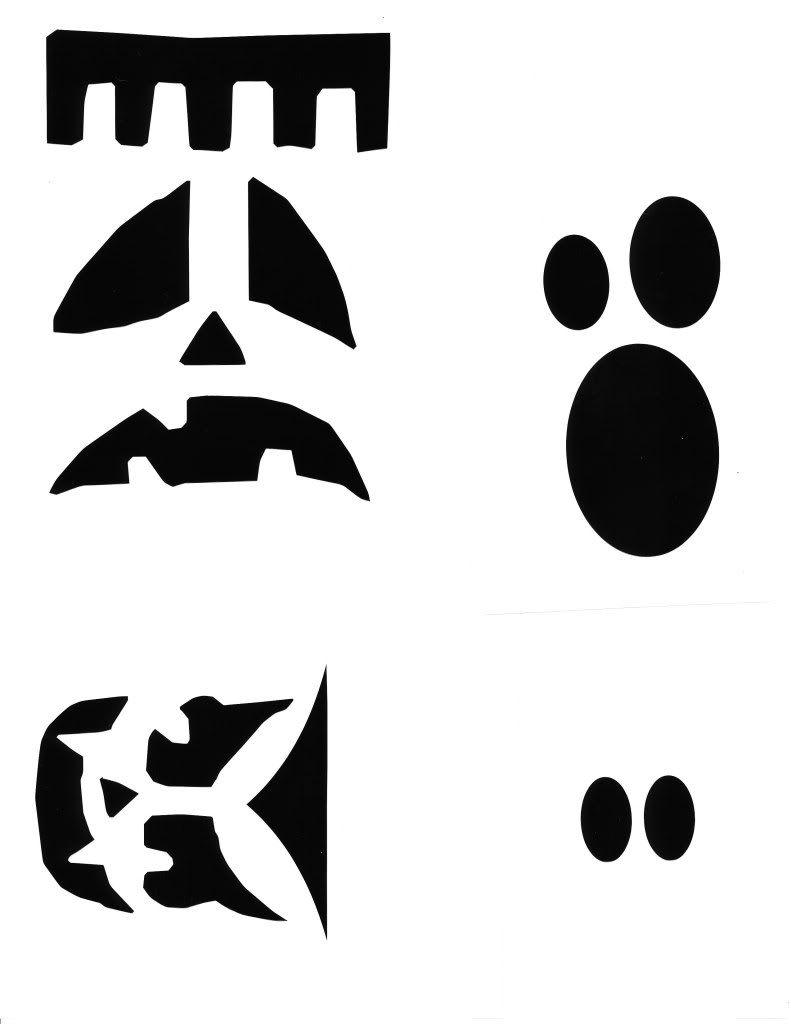
Step 4: Add faces and
ribbon to your jars! We printed these faces
from Not So Idle Hands and cut out each
face. We used regular school glue to
attach them to the jars and the hold seemed to work great. We also picked out some coordinating ribbon
and hot glued a strip around the top and/or bottom. We put a few faces on upside down so the tops
of the jars were actually on the bottom.

Step 5: Put these
beauties on display on a window sill in your home. The natural light shines through well enough
for that great lantern glow. If you
want, put a small tea candle in the jars and light them for your Spooky
Halloween dinner! Be careful! If you go the candle route, the jars will get
very hot! You can also add a string of
Christmas lights inside the jars for a different lighting option.
What do you think about these cuties? The same craft can be used for other holidays
as well. Christmas, Easter or
Thanksgiving! Give them a try!
Still feeling a hidden surge of Halloween craftiness coming
on? Find an old strand of white
Christmas lights, small plastic white cups and googly eyes. Warm up your hot glue gun. Stick a few eyes on the skinnier end (turn
the cup upside down) of 18-10 cups. With
a sharp knife, cut a small X shape slit on the bottom of each cup. Gently push the cup over a light bulb, evenly
spacing the cups throughout the entire stand of lights. This will vary depending on what size stand
you start with. Plug into the nearest
outlet and enjoy your spooky lighted ghost garland!

No comments:
Post a Comment